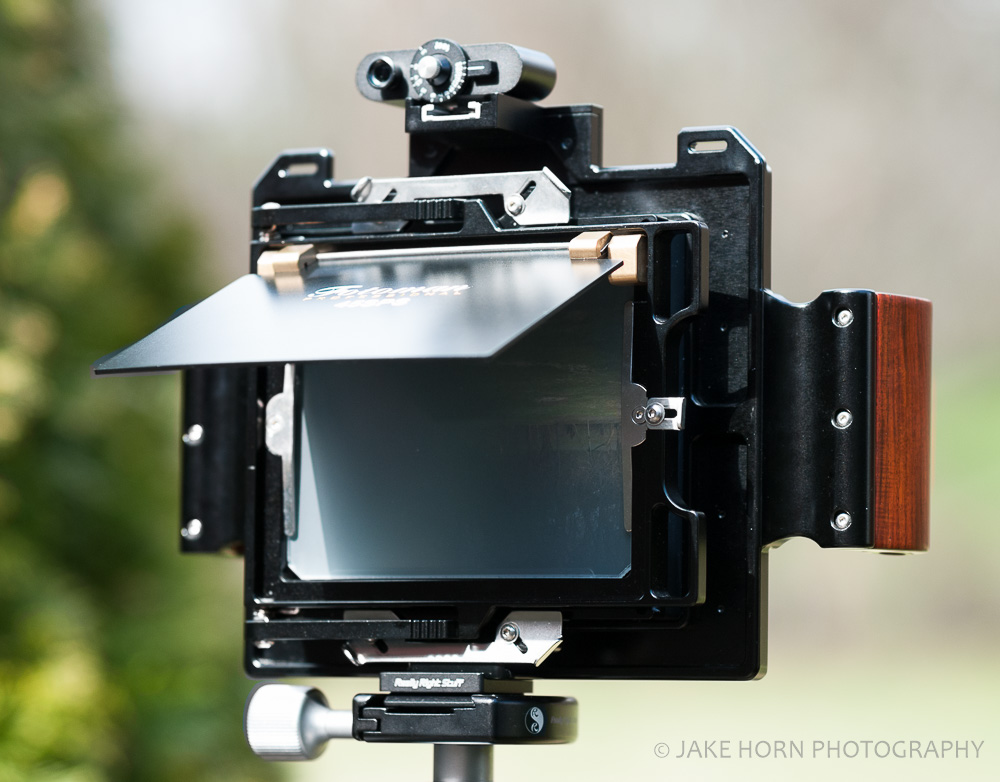
For those who are unfamiliar with Fotoman Professional cameras, one of the coolest things about their products is the ability to fit your own large format lenses to the cone assemblies. The only tough part about this process is making sure the lens is properly calibrated. Only through proper calibration, will you be able to utilize the full benefits of large format point and shoot zone focusing. This process is actually much easier than you think calibrating an optic would be.
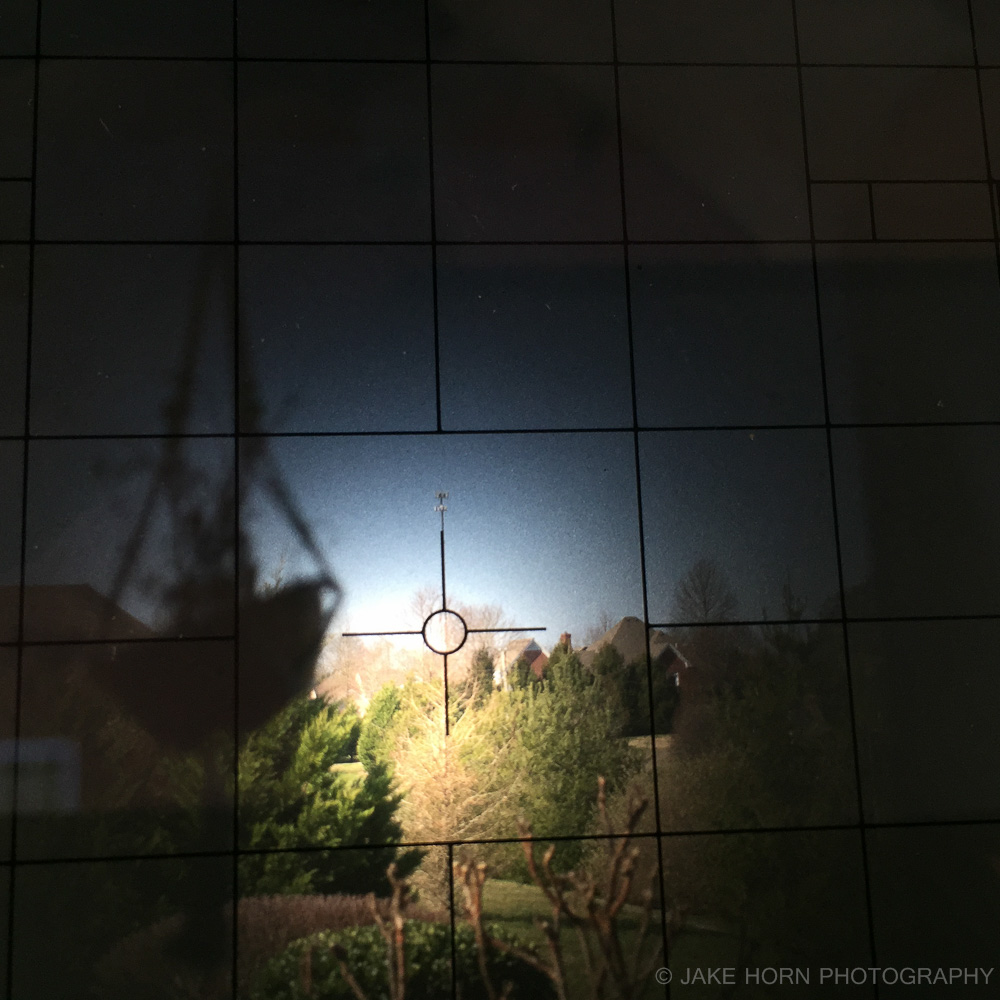
First thing needed is a subject that can be considered at infinity for focusing purposes. I've found a distant cell tower to fit the bill perfectly. As far as tools go, you will need a PH00 flat head, a 1.2 phillips screw driver, spanner wrench, and a powerful focusing loupe.

Fotoman's Helical Mount
For the most part, Fotoman will supply you with the precise cone and spacer combination to match your lens's Effective Focal Length (EFL). This is the distance between the lens mounting flange and the film plane. In other words, the distance between the ground glass and the flat exterior portion of the helical mount when the lens is not attached. You can find this info on the manufacturer's site. My Schneider lenses have lens data posted on the Schneider Optics site. Every optic has a specific EFL inherent to its design, and most large format lenses are not the same.

Helical mounting screws
What you want to do, to maximize the focus throw of your helical, is get your cone's EFL as close to the lens's EFL as possible. If you need to add or delete spacers, this is where the 1.2 phillips comes in. This driver will work on all the screws needed to access the helical mount fasteners. Note: You should error the short side since you can calibrate the helical farther away for the film plane, but never shorter. My previous article can help in the disassembly process.

Fotoman has a range of spacers including: 0.25mm, 0.5mm, 1.0mm, & 2.0mm
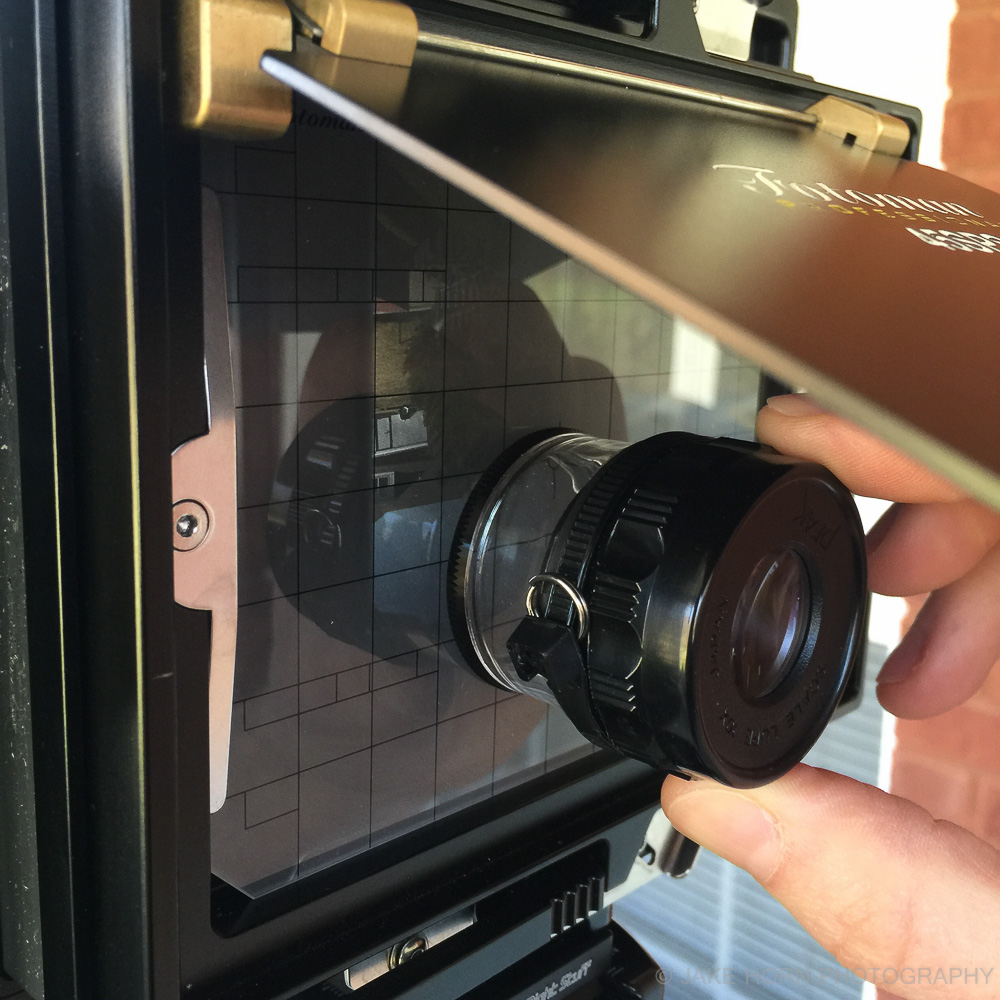
Once you have a spacer/cone combo that gets you close to the EFL, you can now mount your lens to the cone using a spanner wrench. Now mounted, install on the Fotoman and set your camera up as if you were going to take a picture of your infinity object. Before proceeding with focus, loosen the three screws around the distance ring. You will not need to remove, just break these free. The ring should now be able to rotate while still being able to focus the helical. This ring is what provides your infinity stop.

Loosening the three screws around the distance scale ring
You may now focus the lens to infinity, making sure you are as precise as possible. The more powerful your loupe is, the better. Once you nail focus, rotate the distance ring clockwise so that the infinity symbol matches the distance scale focus mark. Snug up the screws, being careful not to rotate the helical. Make sure to not over tighten...these are small and you don't want to strip the heads.

Your lens is now properly calibrated. I usually like to check the close focus indicators on the helical to see how close I can actually focus the lens using scale focusing. Fotoman does sell a long throw helical for longer lenses (greater than 120mm I believe) if closer focus is required. For landscape photography this is usually not needed, but a must for studio work.